
Table of Contents
Embarking on a colorful journey with your hair can be both exciting and nerve-wracking. Have you ever experienced the unexpected twist of your hair is orange after Color Oops? If so, you’re not alone. In this hair-color roller coaster, we’re diving deep into the fascinating world of hair pigments, color science, and the enigma behind the infamous orange hue.
From understanding the chemistry of Color Oops to discovering the underlying reasons for the orange transformation, this article is your guide to unraveling the mysteries and finding solutions to this common hair color conundrum. So, fasten your seatbelts, because we’re about to explore the spellbinding realm of hair colors and their unexpected twists!
The Science Behind Hair Color
Ah, the captivating world of hair color – where science and art collide to create your unique look. Let’s take a peek behind the curtain and discover the secrets that color your locks.
Natural Pigment Symphony: Our hair’s natural shades are orchestrated by the maestro of pigments, melanin. This little miracle worker comes in two main forms: eumelanin, which gifts us darker tones, and pheomelanin, responsible for those lighter hues. Think of them as the foundation upon which your hair color journey begins.
Artificial Color Palette: Now, let’s talk about the stars of the show – artificial hair dyes and pigments. We have a medley of options, each with its own personality:
- Permanent Dye: The long-haul traveler, permanently altering your hair’s destiny.
- Semi-Permanent Dye: The free spirit, fading away gracefully over time.
- Demi-Permanent Dye: The storyteller, offering a temporary narrative before bidding adieu.
Unveiling Underlying Pigments: Imagine these underlying pigments as stagehands, working behind the scenes. Warm tones like red, orange, and yellow are mischievous pranksters that might play tricks on you during color correction. They love making unexpected appearances, especially when stripping away layers of color. But worry not – we have our color-correcting heroes to the rescue.
- Red Undertones: The fiery daredevil that peeks through blonde and lighter shades.
- Orange Undertones: The star of today’s show, often causing post-Color Oops surprises.
- Yellow Undertones: The golden touch beneath some lighter hair colors.
Color Oops vs. Underlying Pigments: Now, let’s set the stage for an epic battle: Color Oops vs. Underlying Pigments! Buckle up as we lay out their interactions in a handy table:
| Hair Color Issue | Underlying Pigments | Color Oops Action |
|---|---|---|
| Brassy, Orange Hue | Orange and Red Undertones | Gently breaks down dye molecules, revealing underlying pigments. |
| Unwanted Warm Tones | Red, Orange, Yellow | Aims to neutralize and cleanse these tones for a smoother canvas. |
| Fading Color Correction | Fading Demi-Permanent Dye | Gradually lightens and fades dye, allowing underlying pigments to show. |
Prepare for a visual feast as the Color Oops and underlying pigments perform their intricate dance, sometimes leading to a captivating transformation and, yes, occasionally leaving us with the intriguing mystery of orange hair.
Why hair is orange after color oops?
Hair can turn orange after using Color Oops due to underlying warm pigments (like red and orange) that become more visible as artificial color is stripped away. Previous hair color history, application time, and your starting hair color level can also contribute to this unexpected outcome.
Warm Tones Take the Stage: Meet the undercover agents of hair color – underlying warm tones. These sneaky characters, like red and orange, love making surprise appearances. When you apply Color Oops, these warm tones sometimes unveil themselves, causing that unexpected orange twist.
Factors that contribute to orange hair after using Color Oops
- Previous Hair Color Adventures: Your hair’s history has tales to tell. If you’ve been on a wild dye ride before, the remnants of those colors can come back to play. Hello, orange!
- Timing Is Everything: How long you let Color Oops work its magic matters. Leave it on a bit too long, and the result might be a bit too orange.
- Starting Point: Just like a road trip, your hair’s starting level matters. Lighter shades have a higher chance of embracing the orange transformation.
Importance of pre-assessment before using Color Oops
- Patch Test Power: Before diving into the Color Oops ocean, do a patch test. Think of it as a dress rehearsal to see how your hair might react.
- Color Chronology: Know your hair’s history! If you’ve tried a spectrum of colors, the chances of the orange reveal increase.
- Porosity Preview: Hair’s porosity, or how it absorbs color, can influence the orange outcome. High porosity hair might be more susceptible to the warm tones’ charm.
Remember, friends, there’s a science and an art to every hair color journey. While the unexpected orange might give you a moment’s pause, it’s all part of the adventure. Embrace the orange twist and let it be a stepping stone toward your ultimate hair color masterpiece! ??
Common Hair Color Levels and Their Impact
Examples of Hair Color Levels and Expected Outcomes:
Level 1: Deepest black, like a moonless night.
Level 2 Brown: With Color Oops, say hello to a warmer brown.
Level 3 Dark Brown: Color Oops might reveal an inviting chestnut undertone, adding warmth to your hair.
Level 4 Medium Brown: Expect a gentle shift towards a warm brown hue, akin to a cozy autumn day.
Level 5: Cool brown, a calm earthy hue.
Level 6 Dark Blonde: Prepare for a brighter, sun-kissed version.
Level 7 Medium Blonde: Color Oops might unveil a sunnier, golden glow to brighten up your locks.
Level 8 Light Blonde: Get ready for a lighter, sunlit effect that embraces warmth, just like a summer’s day.
Level 9 Light Blonde: A delicate dance to neutralize warmth.
Level 10: Lightest blonde, as sunny as a summer day.
How Starting Color Level Affects Color Correction:
Your hair’s starting color level acts as the launchpad for your color correction adventure. Lighter starting levels often result in more noticeable changes after using Color Oops. When you’re at a darker starting level, the transformation might take a bit more time and patience. Think of it like painting on a blank canvas versus adding layers to an existing masterpiece.
Remember, the journey from your starting color level to the final result is like unwrapping a gift – each layer reveals a new surprise, all with the magic touch of Color Oops. ??
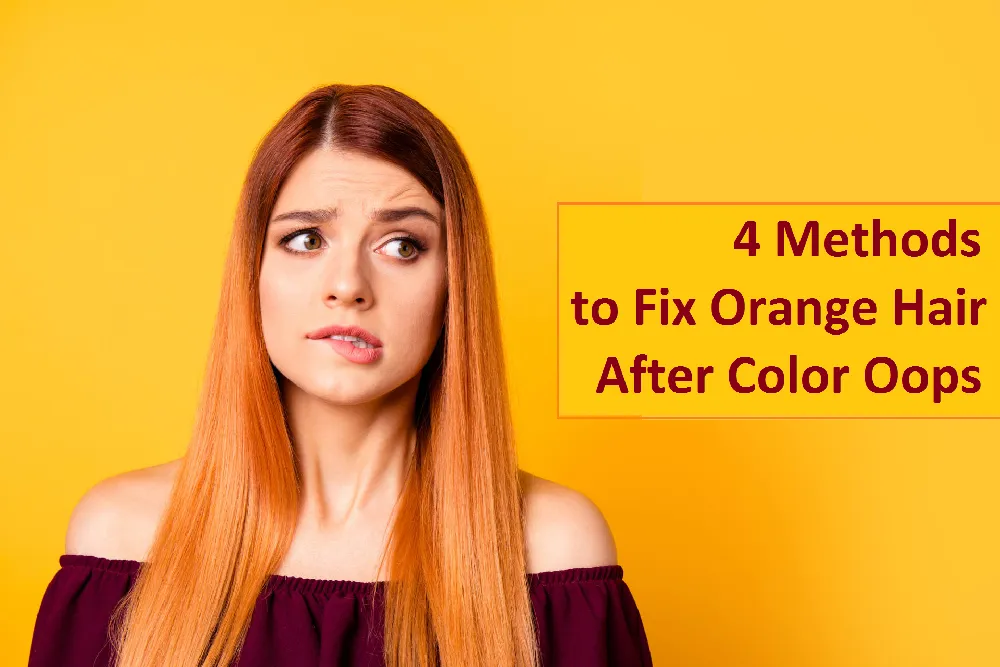
4 Methods to Fix Orange Hair After Color Oops
Method 01: Apply Ash Brown Dye
The optimal solution for rectifying orange hair post-Color Oops treatment involves the application of an ash brown dye. Employing ash brown dye effectively counteracts the orange undertones, resulting in a cooler-toned finish.
Depending on the intensity of the orange in your hair, you can select from a range of ashy tones, whether darker or lighter. For more deeply entrenched orange hues left behind from black dye, a dark brown ash tone is advisable to ensure comprehensive coverage. Alternatively, for lighter orange shades, chocolate or light brown ash hues prove effective.
How to Apply an Ash Brown Dye
- Gather Your Materials: Procure your hair dye, developer (10 or 20 vol), gloves, a tinting brush, a plastic mixing bowl, and conditioner. Alternatively, a hair dye kit containing these components can be obtained.
- Prepare the Area: Shield your best clothing by donning older attire, as dye can stain fabrics similar to hair. To catch any potential dye drips, consider laying down old towels on surfaces like the counter or floor.
- Mix the Dye: If you’re using a permanent box dye, follow the packaging instructions to blend the dye and developer using the provided tools. When using separate supplies, maintain a 1:1 ratio of hair dye and developer, combining them using a tinting brush. For semi-permanent hair dye, mixing with developer isn’t required, yet using a plastic bowl for even distribution is recommended.
- Apply the Dye: Ensure uniform coverage by evenly applying the dye to each strand, avoiding contact with your scalp.
- Allow for Processing Time: After even distribution of the dye, adhere to the recommended processing time. This typically ranges between 25 to 35 minutes, though this can vary based on the chosen dye. During this phase, be cautious of dye on your skin to prevent staining.
- Thorough Rinse: Once the designated time elapses, rinse your hair until the water runs clear. Follow up with either the provided conditioner from the dye kit or your own moisturizing conditioner. Let the conditioner sit for a few minutes before rinsing your hair once more.
By executing these steps with precision, you can confidently transform your orange-tinged hair into a splendidly cool-toned, ashy masterpiece.
Method 02: Apply a Dark Hair Dye
Covering Orange Tones with a Darker Shade: Another approach to tackling the lingering orange tones after a Color Oops treatment is to dye your hair with a darker shade. Dark hair colors have a knack for concealing orange hues effortlessly, provided the chosen color is darker than the existing orange.
When it comes to selecting your shade, you won’t need to be overly particular. Simply pick the one that appeals to you. Applying a dark dye is a straightforward process – you’ll follow the same steps outlined in the previous section.
Method 03: Use a Blue Shampoo
Using Blue Shampoo to Fix Orange Hair: Blue shampoo is like a magic potion for light brown and blonde hair with those unwanted brassy orange tones, even if they pop up after using Color Oops hair color remover. This special shampoo doesn’t just neutralize the orange – it makes it disappear!
But remember, this isn’t a quick fix. Be patient and keep using the blue shampoo once a week for a few weeks to really see the magic happen.
Using blue shampoo is just as easy as using your regular shampoo. Wet your hair, put on the blue shampoo, make it foamy, wait a little, and then rinse.
Matrix Total Results Brass Off is a super popular blue shampoo out there. It’s got strong color power and works its magic in just 3 to 5 minutes. If you go for this shampoo, don’t forget to wear gloves, because it can stain your skin.
Remember: While some ladies prefer purple shampoo to soften brassy hair, our advice is that blue shampoo (or blue toner) is the way to go for the best results.
Method 4: Use a Toner
Using Toner to Fix Orange Tones: Another way to bid farewell to those orange tones is by using toner. Toner is like a color magician – it can wave away the orange and give your hair a smoother, more even look. Look for a toner that leans on the blue side – that’s the one you need!
Now, using a toner might not be your top pick since folks who use Color Oops usually want to steer clear of tough chemicals. But if the other tricks aren’t doing the trick, toning is a better option than going for bleaching.
How to Apply Toner:
For this mission, you’ll need a few things: your chosen toner, 10 or 20-volume developer, a plastic bowl, and a brush for applying. Once you’ve got your gear ready, let’s dive in.
- Set Up Your Space: Wear your old clothes – this is no time to ruin your favorites. Toss down some old towels to keep the mess in check.
- Prep Your Toner: Mix up one part toner with two parts developer in the bowl. Stir it up well with the brush so everything’s nicely blended. Once mixed, get it onto your hair pronto.
- Apply the Toner: Brush the toner onto your hair. You can split your hair into sections to make it easier, especially if your hair is long and thick. Start with the orangy parts, then spread the love to the rest of your hair.
- Let the Magic Happen: After toner is on every strand, let it sit. The waiting game can go up to 45 minutes – don’t go beyond that. Going over might hurt your hair. You can peek at your hair every 5 minutes to see how it’s doing.
- Check and Rinse: Wipe off a tiny hair section to see if the orange is gone. If it’s vanished, you’re on the right track. If not, add more toner to that section and let it chill a bit more.
- Rinse Like a Pro: When your hair looks the way you want, rinse out the toner. It might take a few minutes, so be patient. Leaving any toner behind could spell more trouble.
- Love Your Locks: Wash your hair gently with shampoo, then give it some conditioner love. Your hair needs moisture and protection after all that toning action. Restoring the moisture balance is key after the orange ordeal.
Wella Blondor Permanent Liquid Toner is a rock star for toning away brassiness after Color Oops. It packs blue and purple pigments that take on those pesky orange and yellow bits.
Note: Feel free to use any of these tricks right after using Color Oops. The product’s designed to be pretty gentle. But before you dive in, make sure your hair isn’t looking too damaged with stuff like split ends, mega dryness, and brittleness.
You might also read: Protein Treatment After Color Oops: Your Ultimate Guide
Prevention and Precautions
Importance of Strand Testing Before Using Color Oops:
Think of strand testing as your crystal ball – it foretells how your hair will react to Color Oops. It’s like a trial run before you dive into the magical world of color correction.
Recommendations for Selecting the Right Color Oops Variant:
- Know Thy Color: Understand your current hair color level.
- Pick Your Battles: Choose the right Color Oops variant based on your current color and desired outcome.
- Check the Clock: Consider the processing time – shorter times for less drastic changes.
- Underlying Tones: If warm undertones are your foes, opt for a Color Oops variant tailored to your needs.
- Double Check Ingredients: If your hair has been through a lot, opt for a more gentle formula to avoid further stress.
Limiting the Use of Color Oops If Previous Color History Is Complex:
If your hair’s color history reads like a fantasy novel, it might be wise to call in the professionals. Complex color journeys could use the expert guidance of a colorist who knows their potions and spells.
Maintaining and Extending Color Results
Proper Hair Care Routine Post-Color Correction:
- Gentle Cleansing: Use a sulfate-free shampoo to cleanse your hair without stripping away the color.
- Hydration Boost: Apply a color-safe conditioner to keep your locks moisturized and vibrant.
- Cool Water Rinse: End your shower with a splash of cool water to seal the hair cuticles and lock in the color.
- Heat Protection: Before styling, apply a heat protectant to shield your hair from the heat’s damaging effects.
- Regular Trims: Trim your hair regularly to prevent split ends and maintain a healthy appearance.
Sulfate-Free Shampoos to Maintain Color Longevity:
Sulfate-free shampoos, like Pantene Pro-V Color Revival Shampoo and Herbal Essences Color Me Happy Shampoo, are color’s best friends. They gently cleanse without fading your hues.
Regular Conditioning to Prevent Dryness and Damage:
- Shampoo Gently: Start with a small amount of shampoo, focusing on your scalp, not the ends.
- Apply Conditioner: Coat your strands from mid-length to the tips with a nourishing conditioner.
- Detangle: Use a wide-tooth comb to gently detangle your hair while the conditioner is on.
- Wait and Rinse: Let the conditioner sit for a few minutes before rinsing with cool water.
- Blot and Air Dry: Gently blot your hair with a microfiber towel and let it air dry to minimize damage.
Remember, dear adventurers, that prevention and maintenance are like the shields and swords of your hair color journey. By heeding these precautions and embracing proper care, you’ll prolong the magic of your color while keeping your locks healthy and radiant. ?️?
Emma’s Real-life Experience
Emma McAurthor’s story began with a daring experiment using Color Oops. But the unexpected twist? Her hair turned a vibrant shade of orange! She found herself in the heart of a hair color adventure she didn’t quite plan for.
Emma embarked on a mission to turn her tangerine tresses into the enchanting color she envisioned. Armed with research and a fierce determination, she followed the steps of patience, toning, and color correction. She used a purple toner to neutralize the orange hues, and then applied her chosen color over the toned canvas.
You might also read: Dying Hair After Color Oops: A Comprehensive Guide
With each step, Emma witnessed her hair’s transformation from a surprising shade of orange to the breathtaking color she’d dreamed of. The process wasn’t without its challenges, but Emma’s unwavering spirit and commitment led her to success.
Today, Emma’s story stands as a testament to the power of determination, education, and the magic of color correction. Her journey from orange to her desired hue is a beacon of hope for anyone who’s encountered the unexpected twist of Color Oops. ??
In the realm of hair color, even an orange detour can lead to the most enchanting destinations. Emma’s journey reminds us that with the right knowledge and a touch of perseverance, we can navigate any color challenge and emerge victorious. ?✨
Final Thoughts
In the enchanting realm of hair colors, our journey through the mysteries of why hair turns orange after using Color Oops has uncovered a vibrant tapestry of science and art. From the interplay of pigments to the dance between Color Oops and underlying tones, we’ve navigated the twists and turns of color correction.
Armed with DIY solutions, precautions, and real-life inspirations, we’re ready to face the unexpected with confidence. So, as you embark on your own colorful adventure, may your tresses shine with the brilliance of knowledge and the magic of possibility.