
Table of Contents
Potatoes, those versatile tubers, have found their way into nearly every cuisine on the planet. Whether mashed, fried, baked, or roasted, they’re a culinary cornerstone. But have you ever considered growing these humble spuds right at home? You don’t need a vast garden to embark on this flavorful journey. With the right containers and some know-how, you can cultivate your own supply of fresh, organic potatoes without breaking a sweat.
In this comprehensive guide, we’re going to dig deep into growing potatoes at home in containers. From selecting the perfect potato varieties and preparing the right containers to planting techniques, care, and troubleshooting common issues, we’ve got it all covered. By the end, you’ll not only know how to grow potatoes but also savor the joy of harvesting your own spuds. So, let’s roll up our sleeves and get started on this exciting journey of growing potatoes at home! 🌱🥔
Why Grow Potatoes in Containers
Advantages of Container Gardening for Potatoes
When it comes to growing potatoes, containers are the unsung heroes. Here’s why:
1. Space-Saving
Picture this: You live in a cozy apartment with a small balcony or patio. Yet, you dream of cultivating your own potatoes. Containers make this dream a reality. They take up minimal space and can fit snugly into any nook with good sunlight. No need for a sprawling garden!
2. Pest and Disease Control
Potatoes are tasty, not just to humans but also to pests and diseases. The good news? Containers act as a formidable barrier. They keep marauding insects and soil-borne diseases at bay, ensuring your potato crop stays healthy and thriving.
3. Soil Quality Control
Here’s the secret sauce to growing fantastic potatoes: the soil. With containers, you’re the soil maestro. You decide what goes into that potting mix. You can tailor it to perfection, ensuring your potatoes get the ideal blend of nutrients. No more relying on the hit-or-miss quality of garden soil.
Types of Containers Suitable for Growing Potatoes
Now that you’re sold on the idea, let’s dive into the containers themselves. There’s a whole world of options out there:
1. Container Options
When it comes to choosing a container for your potato-growing venture, you’re spoiled for choice:
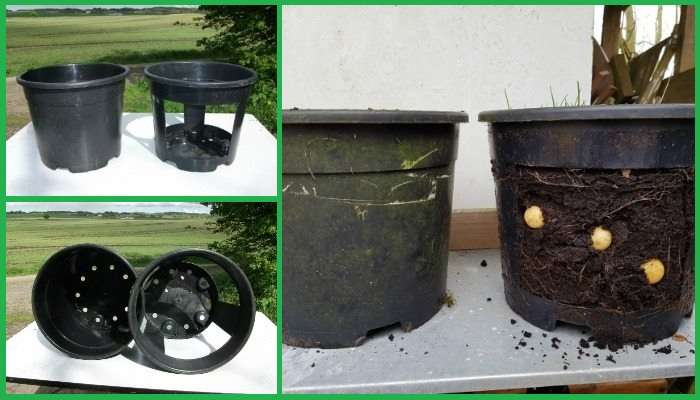
- Pots: Classic and readily available, pots come in various sizes, making them versatile for different potato varieties.
- Bags: Potato grow bags are specifically designed for spuds. They’re lightweight and easy to move around.
- Barrels: Large, sturdy, and perfect for growing a bumper crop.
- Wooden Crates: Rustic and charming, these crates can be a stylish addition to your garden.
- Tires: If you’re feeling eco-friendly, old tires can be repurposed as potato containers.
- Trash Cans: Cleaned and with drainage holes added, they make surprisingly effective potato homes.
2. Factors to Consider When Choosing Containers
Not all containers are created equal. Consider these six factors when selecting the right home for your potatoes:
- Size: Potato plants need space to spread their roots. Opt for containers that are at least 2-3 feet deep.
- Material: Containers can be made of plastic, clay, wood, or fabric. Each has its pros and cons, so choose one that suits your climate and aesthetics.
- Drainage: Proper drainage is vital. Ensure your containers have drainage holes to prevent waterlogging.
- Mobility: Some containers, like bags, are easy to move. Others, like barrels, can become quite heavy once filled with soil.
- Aeration: Potatoes need oxygen to thrive. Look for containers that provide good aeration to the soil.
- Quantity: Consider how many potatoes you want to grow. Different containers have varying capacities.
Armed with this knowledge, you’re now ready to choose the perfect container for your potato-growing venture. So, pick your container, and let’s move on to selecting the right potato varieties for your homegrown spud adventure! 🌱🥔
Selecting Potato Varieties
Different Potato Varieties Suitable for Container Gardening
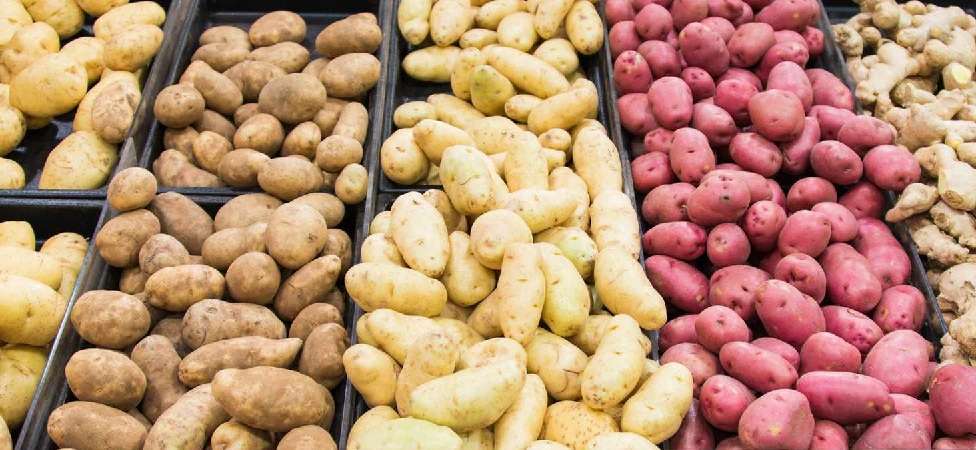
When it comes to choosing potato varieties for container gardening, you have a delightful array of options. Here’s a list of some potato varieties that thrive in containers:
- Yukon Gold: Known for their creamy texture and buttery flavor, these are fantastic for mashing or roasting.
- Red Potatoes: These are perfect for boiling, salads, or simply roasting with a hint of olive oil and rosemary.
- Fingerlings: If you crave gourmet-style potatoes, fingerlings are your best bet. They come in various colors and have a delicate, nutty flavor.
- Russet Potatoes: These are your all-purpose potatoes, ideal for mashing, frying, baking, or making fluffy baked potatoes.
- Adirondack Blue: As the name suggests, these potatoes have vibrant blue flesh. They’re not only striking but also delicious when roasted.
- Kennebec: Known for their versatility, these potatoes are great for fries, chips, or baking.
Considerations When Choosing Potato Varieties
Picking the right potato variety is like choosing the perfect ingredient for your favorite recipe. It can make all the difference in your culinary adventures. Here are three essential considerations to ensure you select the ideal potato varieties for your homegrown spuds:
1. Space Availability
Let’s talk space. Potatoes might not be as demanding as, say, pumpkins, but they do require their fair share of room to stretch their legs and thrive. If you have limited space, consider these options:
- Compact Varieties: Some potato varieties are more compact, taking up less space in your containers. Examples include ‘Yukon Gold’ and ‘Caribe.’ These varieties are perfect for smaller containers like pots or bags.
- Vertical Gardening: If horizontal space is scarce, try vertical gardening. Use tall containers or stackable bags to maximize your growing area without expanding your footprint.
- Successive Planting: Instead of planting all your potatoes at once, stagger your planting over a few weeks. This way, you can harvest in batches, making the most of your limited space.
Remember, the goal is to optimize your available space to grow as many delicious potatoes as possible.
2. Climate
Potatoes, like people, have their climate preferences. They’re not too keen on extreme conditions, whether it’s scorching heat or freezing cold. Here’s what to consider based on your climate:
- Cool Climates: If you live in a region with cooler temperatures, opt for early-season potato varieties. These mature faster and are less likely to suffer from heat stress. Examples include ‘Red Norland’ and ‘Kennebec.’
- Warm Climates: In warmer areas, choose varieties that can handle the heat. Look for heat-tolerant varieties like ‘German Butterball’ and ‘Russian Banana.’
- Season Extension: For those in regions with short growing seasons, consider using containers that can be moved indoors or covered when frost threatens. This way, you can extend your potato-growing season.
Climate considerations ensure your potatoes stay comfortable and produce a bountiful harvest.
With these considerations in mind, you’re now equipped to choose the perfect potato varieties for your container garden. It’s time to get your hands in the soil and start planting your potato adventure! 🌱🥔
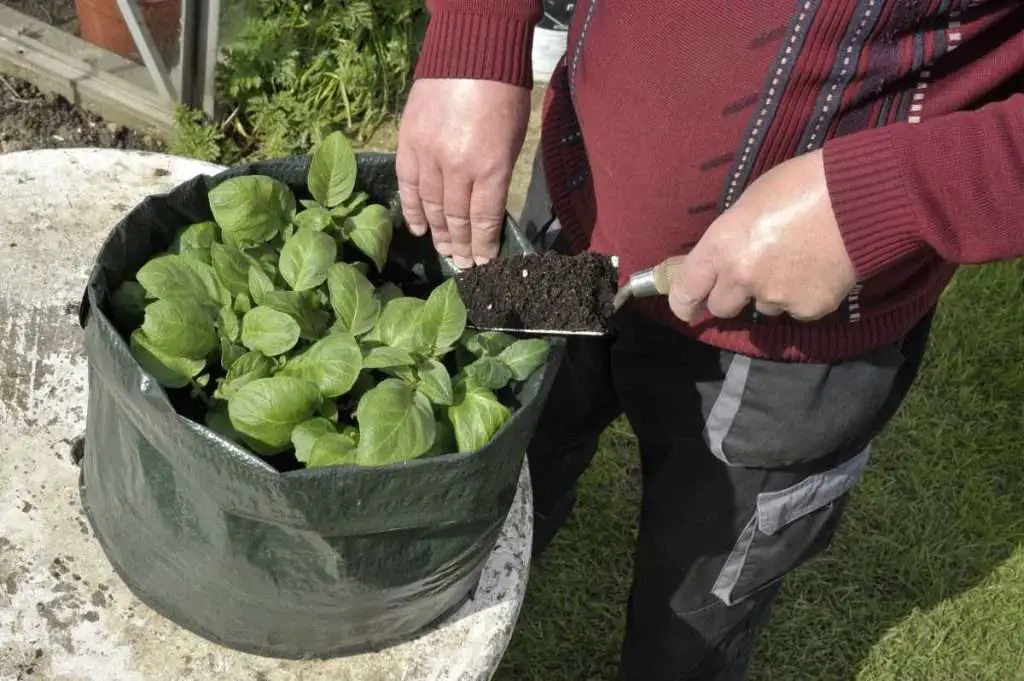
Preparing Container for Potatoes
Now that you’ve got your potato varieties picked out, it’s time to prepare their new home – the container. Think of it like setting the stage for a great performance; the better the setup, the more stunning the show.
Choosing the Right Location for Containers
Location, as they say in real estate, is everything. Your potatoes need a spot that offers:
- Sunlight Galore: Potatoes are sun worshippers. They thrive in full sunlight, so find a location where they’ll get at least 6-8 hours of direct sun each day.
- Wind Protection: While they love sun, they’re not fans of strong winds. A spot with a little wind protection, like near a wall or fence, is ideal.
- Accessibility: Make sure you can easily access your containers for watering, monitoring, and harvesting. You don’t want to contort yourself into awkward positions each time you check on your spuds.
Preparing the Soil Mix
Your soil mix is the potato equivalent of a five-star meal. Here’s how to cook it up:
1. Ideal Soil Composition
Potatoes love loose, well-draining soil. Here’s a recipe for the ideal soil mix:
- Potting Mix: Use a high-quality potting mix as your base. It provides good drainage and aeration.
- Compost: Add a generous amount of compost to your mix. It’s like the seasoning that makes your potatoes tasty and healthy.
- Perlite or Vermiculite: These ingredients lighten the mix and improve drainage.
2. Adding Organic Matter and Nutrients
Potatoes are nutrient hogs, and you want to make sure they’re well-fed. Mix in some well-rotted compost or aged manure to provide a steady supply of nutrients. You can also add a balanced, slow-release fertilizer according to package instructions.
Planting Depth and Spacing Guidelines
Potatoes like to play hide and seek. They need to be planted at the right depth:
- Planting Depth: Bury your seed potatoes about 3-4 inches deep in the soil. As they grow, mound soil around the plants to keep the tubers covered.
- Spacing: Give your potatoes room to spread their roots. Plant them about 8-12 inches apart in rows, with 2-3 feet between rows. If you’re using a larger container, you can plant multiple rows.
Proper Drainage in Containers
Remember that potatoes despise wet feet. Good drainage is the key to their happiness:
- Drainage Holes: Ensure your containers have drainage holes at the bottom. If they don’t, drill some. This prevents water from pooling at the roots.
- Elevate Containers: Place your containers on bricks or pot feet to lift them slightly off the ground. This allows excess water to escape and prevents waterlogged soil.
With your containers perfectly prepped, you’re ready to get down to the fun part – planting those spuds! So, grab your gardening gloves and let’s dive into the next step of this potato-growing adventure. 🌱🥔
Planting Potatoes in Containers
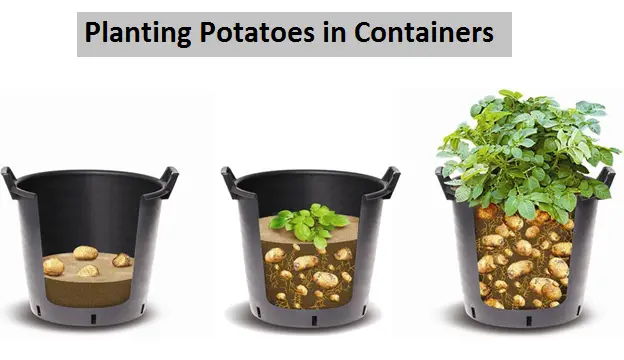
With your containers in prime condition, it’s time to give those potatoes a cozy home. Here’s your step-by-step guide to planting potatoes in containers:
A. Preparing Seed Potatoes
Before the Planting Party Begins:
Seed potatoes are like the starters of the potato world. To prep them for planting:
- Cutting: If your seed potatoes are larger than a golf ball, cut them into chunks. Each chunk should have at least one ‘eye’ (a small sprout). Cutting and letting them sit for a day or two allows them to ‘heal’ and reduces the risk of rot.
- Small Potatoes Whole: If you have small seed potatoes (about the size of a golf ball), you can plant them whole.
B. Planting Techniques
Now, let’s get those potatoes in the ground (well, in the container):
1. Hilling vs. Trenching
Hilling and trenching are two techniques for planting potatoes, and you can choose the one that suits your style:
- Hilling: This method involves planting your seed potatoes about 4 inches deep in the container. As the potato plants grow, you’ll mound soil around them. This encourages more tuber formation along the stem and provides a protective layer.
- Trenching: In trenching, you dig a trench in the container, plant the seed potatoes at the bottom, and gradually fill in the trench as the plants grow. This also encourages tuber development along the buried stem.
Both methods work well, so it’s a matter of personal preference.
2. Planting Depth
Whether you choose hilling or trenching, remember the magic planting depth:
- Depth: Plant your seed potatoes 3-4 inches deep in the soil. Place them with the ‘eye’ or sprout facing up.
C. Watering and Initial Care
Now that your potatoes are snuggled in, they need a little TLC to get started:
- Water: Give your newly planted potatoes a good drink of water to settle the soil around them.
- Mulch: Applying a layer of mulch like straw or leaves helps retain moisture and regulate soil temperature.
- Sunshine: Position your containers in a sunny spot, ensuring they get 6-8 hours of sunlight each day.
- Keep the Soil Moist: Check the soil regularly, and keep it consistently moist but not waterlogged. Overwatering can lead to rot, while underwatering can stunt growth.
With your potatoes settled and the first steps of their journey complete, it’s time to sit back, let nature do its thing, and watch as your potato plants grow and thrive. 🌱🥔
Caring for Container-Grown Potatoes
Growing potatoes is a bit like raising children; they need constant care and attention. Here’s how to pamper your potato plants in containers:
Watering Requirements
Hydration Happiness: Potatoes have a love-hate relationship with water. They need consistent moisture, but they detest waterlogged feet. So, here’s the watering lowdown:
- Consistent Moisture: Keep the soil consistently moist, like a wrung-out sponge. Water whenever the top inch of soil feels dry, typically once or twice a week, but adjust according to weather conditions.
- Avoid Overwatering: Overwatering can lead to rot and diseases. Ensure proper drainage in your containers, and don’t let them sit in water.
Fertilizing Schedule
Feeding Time: Potatoes are heavy feeders. They thrive with a regular supply of nutrients. Here’s your fertilizing schedule:
- Start with a Balanced Fertilizer: When your potato plants are about 6 inches tall, give them a boost with a balanced, all-purpose fertilizer. Follow the package instructions.
- Repeat Every 2-3 Weeks: Throughout the growing season, continue to fertilize every 2-3 weeks. This ensures your potato plants have the nutrients they need to produce a bountiful harvest.
Sunlight and Temperature Considerations
Sun and Temperature Love: Potatoes are sun worshippers and temperature enthusiasts. Cater to their needs:
- Sunlight: Ensure your containers receive 6-8 hours of direct sunlight daily. They’ll thank you with robust growth and a hearty potato crop.
- Temperature: Potatoes thrive in cool weather. Ideal temperatures range from 60°F to 70°F (15°C to 24°C). If you’re growing in hot climates, provide some afternoon shade to prevent heat stress.
Monitoring for Pests and Diseases
Keep an Eagle Eye: Pests and diseases can crash the potato party, but you can thwart their plans with vigilant monitoring:
Common Potato Pests and How to Manage Them
| PEST | SIGNS OF INFESTATION | MANAGEMENT |
|---|---|---|
| Colorado Potato Beetle | Stripped leaves, bright orange eggs on the underside of leaves | Handpick beetles and eggs, apply neem oil or insecticidal soap |
| Aphids | Yellowing leaves, sticky residue on plants | Spray with a strong jet of water, release ladybugs or lacewings |
| Wireworms | Irregularly shaped holes in potatoes, chewed roots | Use potato bait traps, rotate crops, till soil to expose larvae |
| Slugs | Irregular holes in leaves and tubers | Set up slug traps, use diatomaceous earth, keep the garden clean |
Preventing and Treating Potato Diseases
| DISEASE | SIGNS AND SYMPTOMS | PREVENTION AND TREATMENT |
|---|---|---|
| Late Blight | Brown spots on leaves, dark lesions on stems, rotten tubers | Remove infected plants, use disease-resistant varieties, apply fungicide |
| Early Blight | Dark spots with concentric rings on leaves, yellowing foliage | Remove infected leaves, mulch to prevent soil splashing, use fungicide |
| Scab | Rough, scaly patches on potato skins | Plant disease-free seed potatoes, maintain proper pH levels, reduce soil moisture |
| Potato Cyst Nematodes | Stunted growth, yellowing leaves, knobby tubers | Practice crop rotation, use resistant potato varieties, treat with nematode-killing plants |
Mulching for Moisture Retention and Temperature Regulation
Mulch Magic: Mulching is like giving your potatoes a cozy blanket. It helps in moisture retention and temperature regulation:
- Mulch Benefits: Apply a layer of mulch like straw, leaves, or compost around your potato plants. Mulch conserves moisture, prevents weeds, and regulates soil temperature.
- Application: Keep the mulch about 2-3 inches thick, ensuring it doesn’t touch the potato stems directly.
By following these care instructions, you’re not only protecting your potato plants but also ensuring a successful harvest. Keep an eye out for those common pests and diseases, and take action promptly. Your potatoes will thank you with a bountiful and delicious yield. 🌱🥔
Maintaining Container Potatoes
Your potato plants are growing, and now it’s time to ensure they continue to thrive. Here’s how to maintain your container-grown potatoes:
Hilling or Mounding the Soil
Keep ’em Covered: Hilling, or mounding, is a crucial step in potato care:
- Why Hill: As your potato plants grow, they send out new stems above the original seed potatoes. Mounding soil around the stems prevents sunlight from reaching the tubers, preventing greening and protecting them from pests.
- When to Hill: Start hilling when your plants are about 6 inches tall. Continue hilling every few weeks as they grow, gradually building up a mound around each plant.
Pruning and Staking for Support (If Needed)
Stand Tall: Potato plants can become top-heavy, and you might need to provide support:
- Pruning: If your potato plants grow excessively tall or become leggy, you can prune the top growth to encourage the plant to focus on tuber development.
- Staking: If your potato plants are sprawling or leaning, stake them gently to provide support. This prevents breakage and helps keep your potato plants upright.
Regularly Inspecting and Addressing Issues
The Vigilant Gardener: Regular inspections are your best defense against problems:
- Check Leaves: Inspect the leaves for signs of pests or diseases. Remove and dispose of any affected leaves immediately to prevent the spread.
- Weed Control: Keep the area around your containers weed-free. Weeds can compete with your potatoes for nutrients and water.
- Soil Moisture: Monitor soil moisture and adjust your watering schedule as needed to keep it consistently moist but not waterlogged.
Harvesting Time and Signs of Readiness
Harvesting Gold: The moment of truth has arrived – it’s time to reap what you’ve sown:
- Timing: Most potatoes are ready for harvest 70-90 days after planting. The best time to harvest is when the plants are still green but starting to yellow and wither.
- Proper Harvesting Techniques: Gently dig around the base of the plant with a garden fork or your hands. Avoid stabbing the tubers. Harvesting should be done on a dry day when the soil is not too wet.
- Curing and Storing: After harvesting, let the potatoes cure for about two weeks in a cool, dark, and well-ventilated place. This allows the skins to thicken and the flavors to develop.
- Storing for Freshness: Store your cured potatoes in a cool, dark, and dry place, ideally between 45°F to 50°F (7°C to 10°C). Avoid storing them in the refrigerator, as this can affect their taste and texture.
Now, with a successful harvest in hand, let’s move on to the final steps – storing your precious potatoes for future delicious meals. 🌱🥔
Harvesting and Storing Potatoes
The moment of truth has arrived, and your potato plants have yielded a bounty. Now, let’s learn how to harvest and store those homegrown spuds for months of culinary delights.
Timing the Harvest
Patience Pays Off: Timing is everything when it comes to potato harvesting:
- When to Harvest: Wait until your potato plants are mature, typically 70-90 days after planting. Harvest when the foliage begins to yellow and wither, signaling that the potatoes are ready to be dug up.
- Early Harvest: If you can’t wait, you can harvest ‘new’ or ‘baby’ potatoes earlier, about 2-3 weeks after flowering. These are smaller but incredibly tender and delicious.
Proper Harvesting Techniques
Handle with Care: Harvesting potatoes requires a gentle touch to avoid damaging these delicate treasures:
- Tools: You can use a garden fork or simply your hands. Start by gently loosening the soil around the plant.
- Digging: Lift the plant out of the container carefully. Dig around to locate the tubers, being cautious not to damage them.
- Gently Unearth: Remove the potatoes one by one, being as gentle as possible. Damaged potatoes won’t store well.
Curing and Storing Harvested Potatoes
The Post-Harvest Ritual: Curing is a crucial step in preparing your potatoes for long-term storage:
- Curing: After harvesting, let your potatoes ‘cure’ for about two weeks in a cool, dark, and well-ventilated spot. This allows the skins to thicken, reducing the risk of disease, and enhances the flavor.
- Storage Containers: Choose storage containers wisely. Burlap sacks, cardboard boxes, or mesh bags work well. Avoid plastic bags, as they can trap moisture and promote rot.
- Cool, Dark, and Dry: Store your potatoes in a cool, dark place with good ventilation. Ideal storage temperature is between 45°F to 50°F (7°C to 10°C). Keep them dry to prevent mold and rot.
- Check Regularly: Periodically inspect your stored potatoes for any signs of rot or sprouting. Remove any spoiled potatoes to prevent them from affecting the others.
Now that you’ve successfully harvested and stored your homegrown potatoes, you’re all set to enjoy months of culinary delights with the fruits of your labor. Whether mashed, fried, roasted, or baked, your potatoes will be a testament to your green-thumb prowess. Bon appétit! 🌱🥔
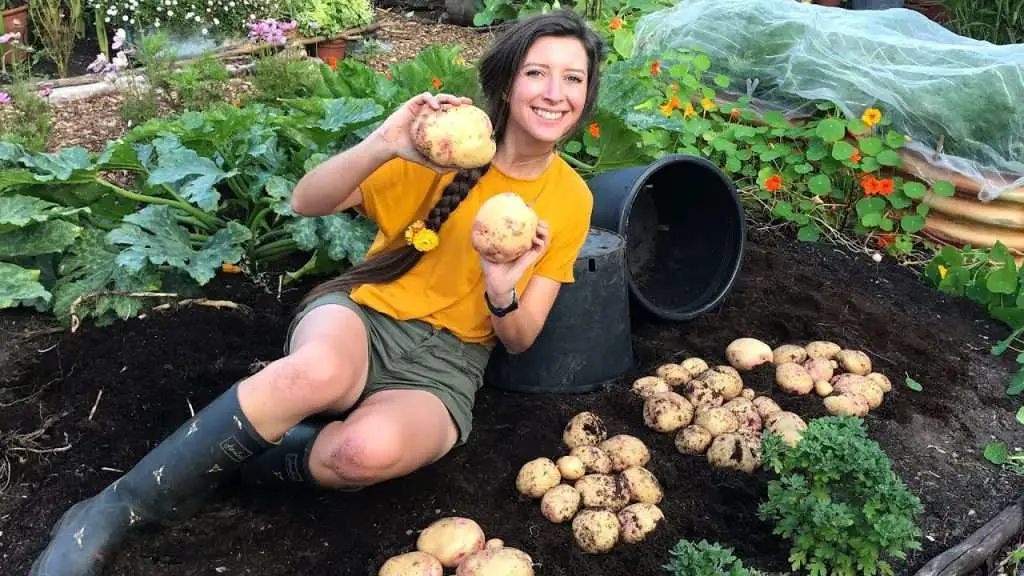
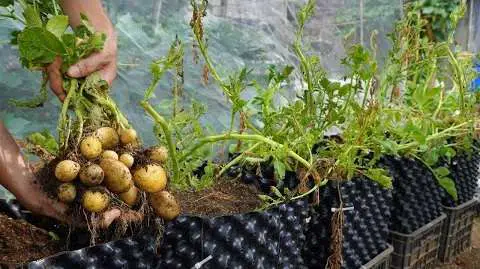
Enormous harvest of Container Grown Potatoes
Troubleshooting Common Issues
Growing potatoes can sometimes be like a rollercoaster ride with its ups and downs. Here’s how to troubleshoot and tackle common issues:
Yellowing Leaves and What It Means
Yellow Flags: Yellowing leaves on your potato plants can signal various problems:
- Nutrient Deficiency: Yellowing between the veins can indicate a lack of nitrogen. Consider adding a balanced fertilizer.
- Water Stress: Overwatering or underwatering can cause yellowing. Ensure consistent soil moisture.
- Pest or Disease: Yellowing can also be a sign of pest or disease infestation. Inspect the leaves and stems for signs of trouble.
Signs of Overwatering or Underwatering
Finding the Balance: Both overwatering and underwatering can harm your potatoes:
- Overwatering: Signs include waterlogged soil, wilting, yellowing leaves, and rotting tubers. Adjust your watering schedule to allow the soil to dry slightly between waterings.
- Underwatering: Symptoms include wilting, dry and crispy leaves, and slowed growth. Water more frequently to keep the soil consistently moist.
Dealing with Pests and Diseases
Pesky Pests and Diseases: Pests and diseases can wreak havoc on your potato plants:
- Identification: Regularly inspect your plants for signs of trouble. Use the tables provided in section VI to identify and manage common pests and diseases.
- Natural Remedies: Consider using natural remedies like neem oil, diatomaceous earth, or introducing beneficial insects like ladybugs to combat pests.
- Prompt Action: Address issues promptly to prevent them from spreading to the entire crop.
Addressing Nutrient Deficiencies
Hungry Plants: Nutrient deficiencies can stunt your potato plants:
- Identify the Deficiency: Learn to recognize the symptoms of nutrient deficiencies, such as yellowing leaves or poor growth.
- Fertilize Appropriately: Adjust your fertilizing schedule and type of fertilizer to address the specific deficiency. Follow package instructions carefully.
5 Tips for Success Potatoes Gardening
Here are five golden nuggets of wisdom to ensure your container potato gardening adventure is a resounding success:
5 Best Practices for Container Potato Gardening
- Choose the Right Container: Select containers that suit your space and climate. Consider factors like size, material, and drainage.
- Select the Right Potato Varieties: Match potato varieties to your climate and culinary preferences.
- Proper Soil Mix: Invest in high-quality soil and amend it with compost for a nutrient-rich blend.
- Consistent Care: Be diligent with watering, fertilizing, and monitoring for pests and diseases.
- Harvest with Care: Harvest at the right time, and store your potatoes properly to enjoy them for months.
Seasonal Considerations
- Spring: Start planting as soon as the soil can be worked, usually when the soil temperature reaches 45°F to 50°F (7°C to 10°C).
- Summer: Keep up with watering, and monitor for pests and diseases, which are more active during warm weather.
- Fall: Harvest your potatoes before the first frost hits.
You might also read:
FAQs about container gardening for potatoes at home
1. Can I reuse the same soil in my potato containers for the next growing season?
Answer: Yes, you can reuse soil from your potato containers for the next growing season, but it’s essential to refresh it. Remove any remaining plant debris and add fresh compost or well-rotted manure to replenish nutrients. This helps maintain soil fertility and structure for healthy potato plants in the next season.
2. How do I prevent my potato plants from getting too tall and falling over in containers?
Answer: To prevent tall potato plants from falling over in containers, you can employ a few strategies. First, choose compact potato varieties that are naturally more bushy and less prone to excessive height. Secondly, provide support by gently staking or tying the plants to keep them upright. Finally, avoid over-fertilizing with high-nitrogen fertilizers, as this can encourage excessive foliar growth at the expense of tuber development.
3. Can I grow potatoes in containers indoors?
Answer: Yes, you can grow potatoes in containers indoors, provided you have enough light. Potatoes require at least 6-8 hours of direct sunlight daily. If you have a sunny windowsill or access to grow lights, you can successfully grow potatoes indoors. Ensure your containers have proper drainage, and be cautious about overwatering, as indoor conditions may be more prone to moisture-related issues.
4. How do I prevent my potatoes from getting green and bitter?
Answer: Potatoes turn green when exposed to sunlight, which produces a naturally occurring toxin called solanine. To prevent this, ensure that your potato containers are in a location with adequate sunlight but protect the tubers from direct sunlight. As the plants grow, continue to mound soil or add mulch to cover any exposed tubers. Additionally, harvesting your potatoes when they are mature but still green and storing them in a dark, cool place helps prevent greening and bitterness.
5. Can I grow potatoes in containers year-round?
Answer: Growing potatoes year-round in containers may be challenging, as they have specific temperature and light requirements. Potatoes thrive in cooler temperatures, typically between 60°F to 70°F (15°C to 24°C). If you live in a region with harsh winters, you may need to move your containers indoors or to a protected area during the cold months or grow them during the warmer seasons when conditions are more favorable for potato cultivation.
